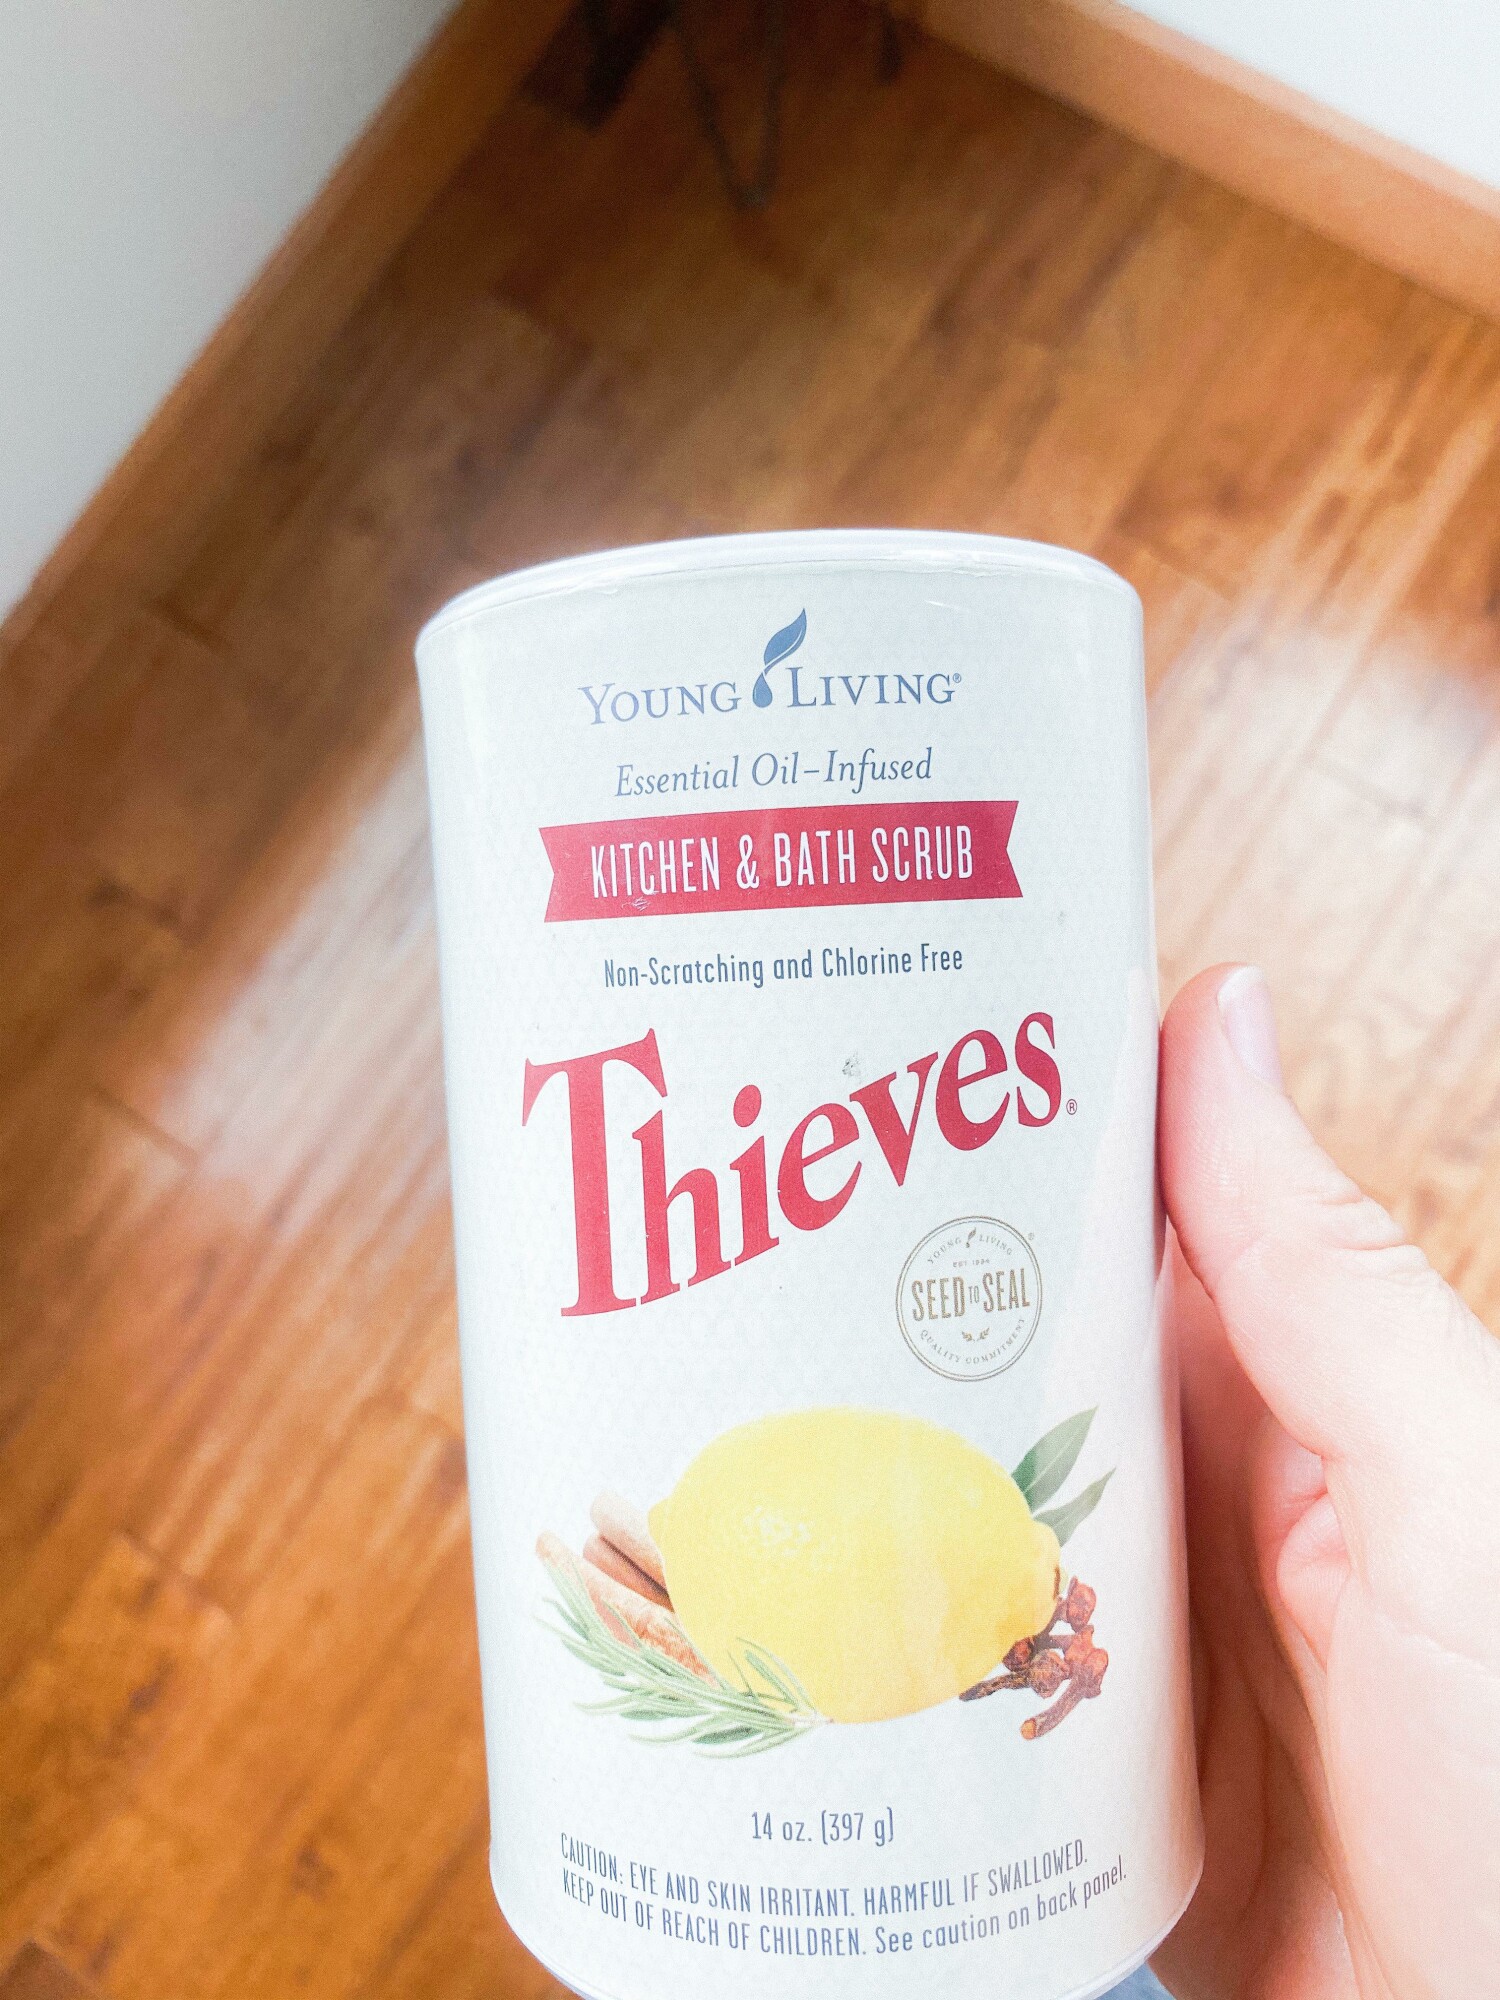
Our home has always had really hard water. I hate the way it stains all of my bathroom and kitchen sinks and tubs. The yellow tint would take hours of scrubbing to finally even make a dent in it. I found myself so many times just ignoring it and not even trying. Then last month changed my life. I had the opportunity to get my hands on Young Living's new Thieves Kitchen and bathroom scrub.
Time to get to work on my bathroom shower first. It was the worst one of them all, so I figured it would tell me really fast if this new tool was going to work or not.
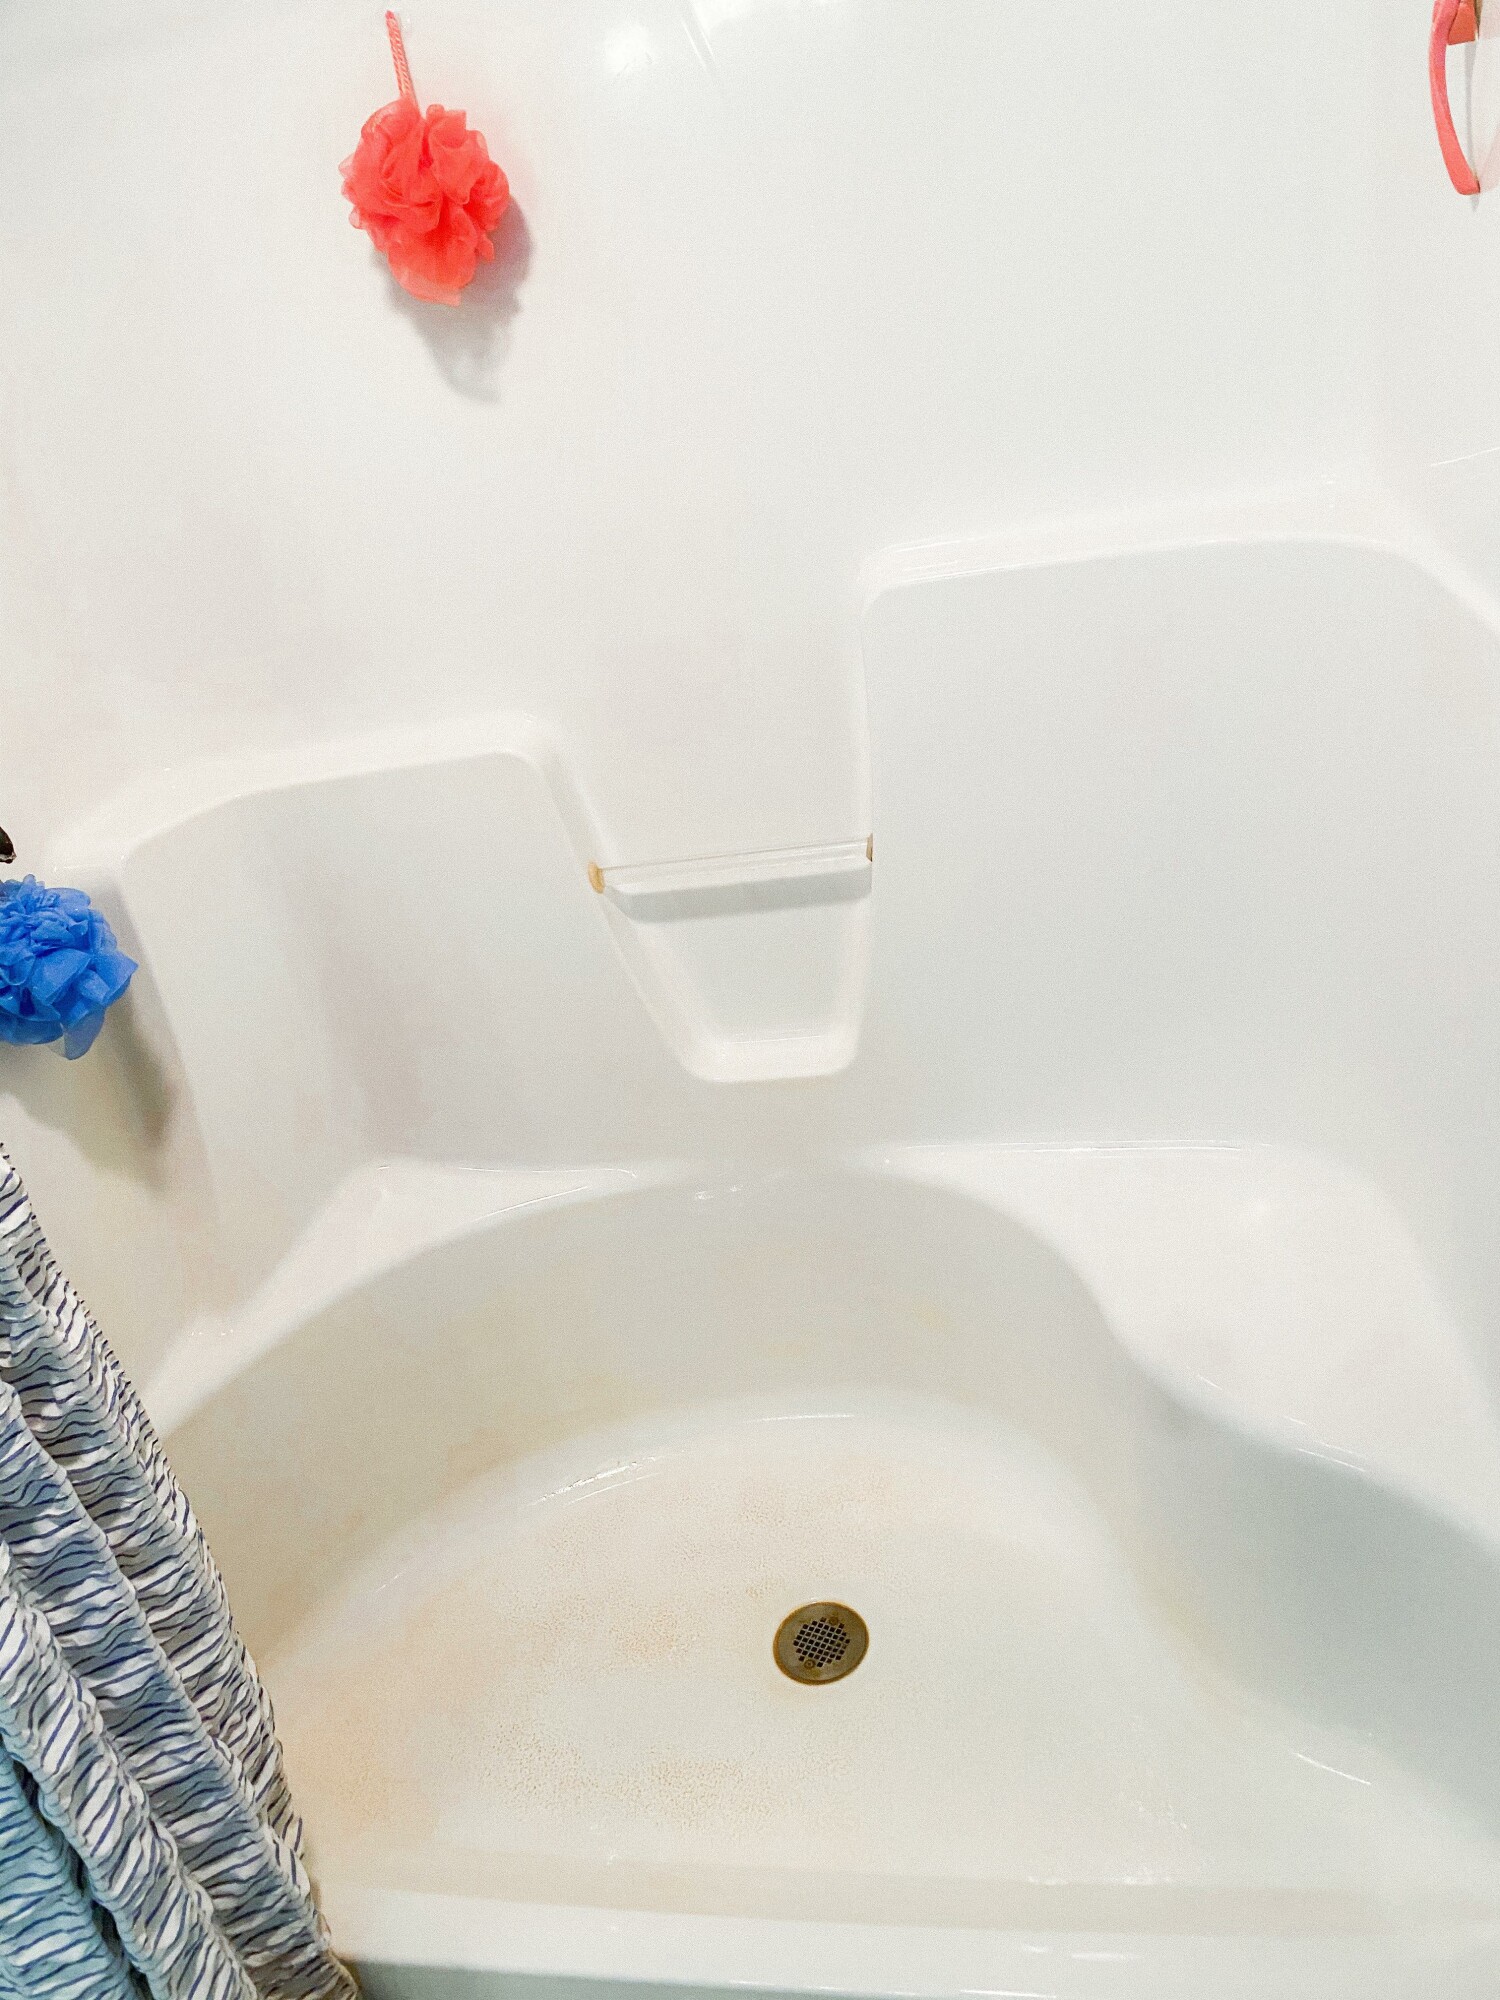
As you can see my shower was covered in hard water residue.
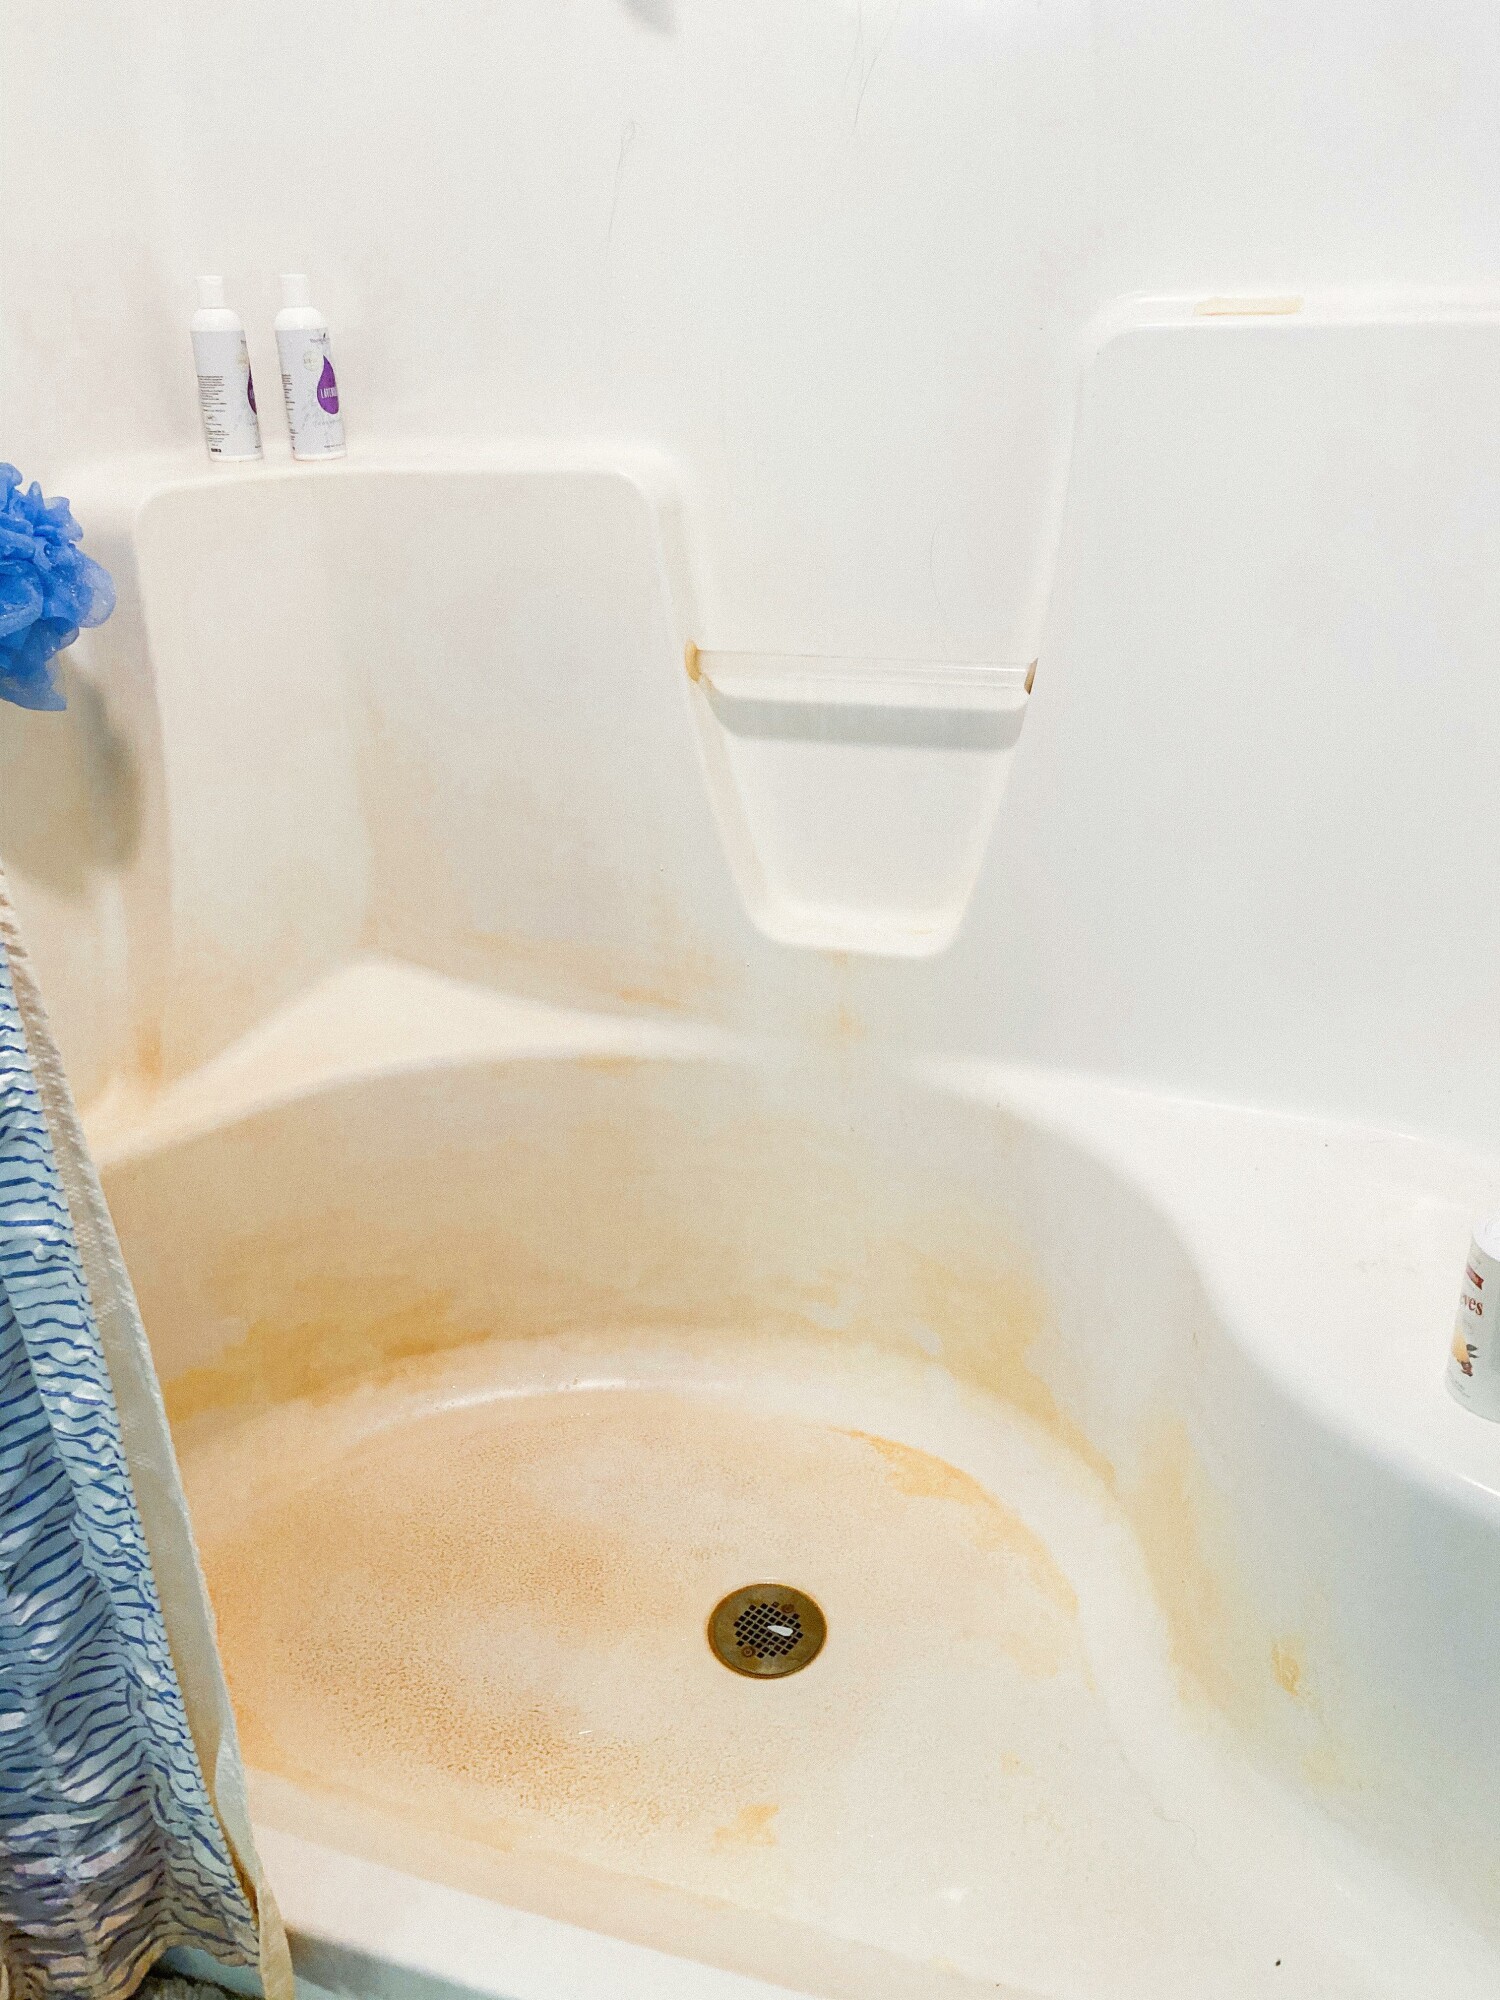
This normal project would take about an hour total with several times of scrubbing, walking away, scrubbing, walking away. I sprinkled the scrub on the base of the shower, the walls, and the shelves. I started by scrubbing the base first. It seriously shocked me how fast the hard water residue just came right off. Literally 7 minutes into this project, I ended with a much different version of my shower. Check this out!!
Get yourself some of this scrub. It is 100% worth it!!
Scrub-a-dub-dub.. I am off to make all my other bathrooms sparkly clean,
Jenn

We all have heard the story of Esther and how she bathed in Myrrh for six months. I mean anything fit for a queen surely should be something I want to use, right?!?! A few weeks ago, Gersey woke up with a nasty yeast rash. It honestly is the worst any of my babies has ever had. I am pretty particular about my baby's booties so I never put them to bed at night without a nice layer of my favorite booty cream on it to protect it from moisture. This is also my favorite cream to use for heat/rub rash between the legs during summer time. It soothes the pain and prevents it from happening if used beforehand. Even if you don't have little ones in your house, I assure you that this will still be a lifesaver for MANY things!!

Now back to the yeast rash... I noticed after a few days, that the seedlings alone wasn't enough. It was keeping it at bay, but not totally getting rid of it or stopping new spots from starting. And we all know how stubborn and quick moving a yeast rash can be. Throw in the fact that it is warm out and this gorgeous baby has biscuit roll legs, we needed something more. I mean you can't see them here, but this little girl has rolls for days....
This is when I decided to pull out the Myrrh. I had several bottles I had gotten free as a monthly promo for YL. For that I was super thankful for. It was on hand, so I could use it immediately. I have used Myrrh multiple times for my face when I needed a boost in my complexion, and I knew that Myrrh was incredibly amazing for all things skin. So I began to put Myrrh all over her yeast areas during every diaper change. I love that Myrrh is incredibly soothing and soft and didn't need diluted. It made it quick and no mess for me when I would change her. Within a week we had made MAJOR progress. I am happy to report today that this little girl only has a tiny dime sized spot left that we are tackling. She has been such a trooper through it, and has happily enjoyed chewing on the Myrrh bottle when I am done using it. Thank you safe products for my little ones!!!!
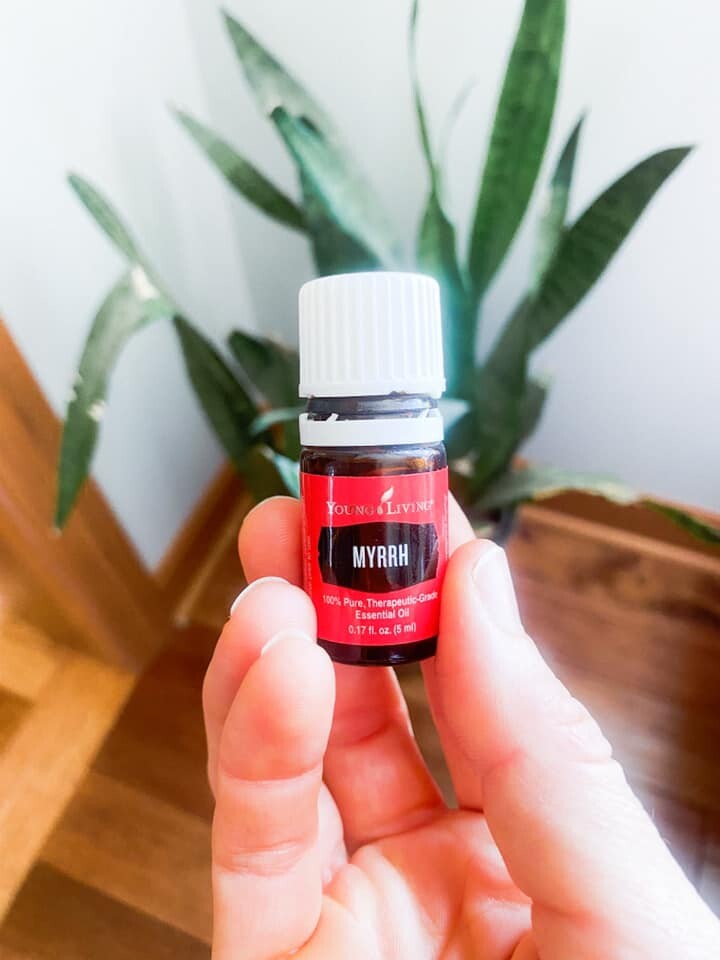
This little bottle has saved me so many times. Whether it be on a new baby belly button that needs to shrivel up, extra sunshine protection outside, a bad mouth sore from biting my cheek when eating, or a yeast infection on my little one.. it has never disappointed. And the icing on the cake was that it didn't cost me a dime!! That alone is priceless. Myrrh... there was a reason Queen Esther used it, and there was a reason they made sure to tell us that in the story.
Hugs,
Jenn
Sometime between the year 2000 and 2008, my MD introduced me to Tom Woloshyn who performed a technique called VitaFlex and changed my health and life forever. I subsequently studied and learned the technique as detailed in Stanley’s book, Healing for the Age of Enlightenment.
Tom, a long-time student of Stanley Burroughs, developer of VitaFlex, told me this story as it was told to him by Stanley. Around the year 1928/29 Stanley had a vision and saw himself performing a unique massage technique using touch on one part of the body to make changes in a totally different part of the person’s body. In his mind’s eye he could even see charts showing which points were interconnected. Later Stanley encountered some Tibetan Lamas who recognized the technique he was using and told him it had been used in Tibet for over 5000 years.
Stanley called the technique VitaFlex. As Tom explained, “The word reflex is derived from reflexive, meaning “to direct back onto one’s self”. A person who does Vita-Flex is activating the inborn system of bodily reflexes to correct or balance the body by its own natural means.” The VitaFlex movement can be performed on multiple areas of the body, including the arms, hands, feet, scalp, and shoulders.
After Gary Young’s logging accident, he became acquainted with Stanley and learned Stanley’s VitaFlex protocol. Always the pioneer, Gary modified the technique to incorporate essential oils, applying them to the spinal reflexes on the feet. I suggest you read this in its entirety before attempting and relax knowing it is much easier to perform than it is explain and read. If you have questions, feel free to contact me on fb. Thanks for reading! -Peggy Hays
Energetically we receive with our left hand and give with our right. With Gary’s technique, you begin by placing the oil in your left hand (receiving).
1. Hold your desired bottle of oil at least 3 inches above your left palm and allow 3 drops to fall into your left hand.
In the human body both the cardiovascular and digestive systems move in a clockwise direction as does our DNA. Due to the meticulous growing, harvesting, processing, and distilling of Young Living oils; the Vital Life force in the plant remains in the oil even after it is bottled and stored. In the bottled environment the Life Force energy is in a state of suspended animation until it is released from the bottle. Upon release, stirring the oil in a clockwise direction aligns it with our biological system’s movements.
2. Using the fingertips of your right hand, stir the oil 3 times in a clockwise direction.
On the bottoms of the feet are reflex points that, when stimulated, affect every aspect of our physical body. If in your mind’s eye you superimpose a picture of the human body upon the feet with the head aligned to the big toes and the bottom of the trunk aligned to the heels of the feet you have a general idea of which parts of the foot reflex to the anatomy. Unlike some other techniques you may have encountered, Gary’s technique calls for the right hand to work with the right foot and the left hand to work with the left foot.
3. Place the pad of your right pointer finger on the inside anklebone on the right foot; then move your pointer finger downward until you reach the edge of the foot at the approximate point where the arch and the heel meet. This is the reflex point for the lower part of the spine.
4. Allow your remaining finger pads to come into contact with the edge of the arch with your thumb resting comfortably on top of the foot.
This is not a pressure technique. It is an energetic/electrical technique. The premise is that slight pressure applied to the body by a rolling motion of the finger pads, tips and nails creates an electrical charge that is therapeutic in nature. This piezoelectric charge works much like an electrical light switch. The charge produced, travels along energetic pathways until it comes to a gap in the pathway where it then repairs the break that is causing an imbalance in the body. By using essential oils with this technique, you are sending customizable messages via the piezoelectric charge. How cool is that????
5. Begin a rolling motion; roll from your finger pads onto the tips of the fingers and then continue to roll the fingers over so the back of the nail is in contact with the skin(pad-tip-nail)and back to the pads.
6. Move pads ever so slightly in the direction of your little finger and repeat the pad-tip-nail process until you have moved off the tip of the big toe.
Repeat the entire process on the left foot.
Hold your desired bottle of oil at least 3 inches above your right palm and allow 3 drops to fall into your right hand.
2. Using the fingertips of your left hand, stir the oil 3 times in a clockwise direction.
3. Place the pad of your left pointer finger on the inside anklebone on the left foot; then move your pointer finger downward until you reach the edge of the foot at the approximate point where the arch and the heel meet.
4. Allow your remaining finger pads to come into contact with the edge of the arch with your thumb resting comfortably on top of the foot.
5. Begin a rolling motion; roll from your finger pads onto the tips of the fingers and then continue to roll the fingers over so the back of the nail is in contact with the skin(pad-tip-nail)and back to the pads.
6. Move pads ever so slightly in the direction of your little finger and repeat the pad-tip-nail process until you have moved off the tip of the big toe.
Okay, let’s talk about stress/tension relief,
It’s a for sure buzz-word and what literally, every single one of us wants. (can all the mama’s, working ladies and gents and every human in general say a hearty, amen??). When I first joined YL, I knew I was wanting to discover some natural tools to deal with stress, anxiety and overwhelm. I’ve always been drawn to my oily friends, they always smell so good (is that creepy to say or..? 😂). I knew using oils to handle everyday stress would be a GAME CHANGER, and guess what, it was… Why am I not surprised!
Aside from the many jokes I make to my sister, who is a mom of 2 under 2, about chugging or intravenously taking Stressaway (LOL), I’ve come to realize, dealing with stress, frustration, etc. is completely normal. Whatever the stressors or unknown triggers may be, oils are SUCH an important and underrated support. I think unlocking the realm of possibility is exciting too, fills me with hope! And for anyone who struggles with anxiety or high stress levels that especially results in physical tension, you know that the hope that things will eventually be okay/not always like this, is like a life raft.
I was a Contemporary Dance Major in University and has made me ridiculously aware of my body in each of its emotional states. This I’ve found is such a key of how to apply and maximize oil application during various moments. Oils are inherently healing, and taking some time just to focus on locating and applying an oil has helped to ground me. It gives me a task to do in the moment that I know is doing something beneficial for me. Whether it’s the gripping pressure around your heart when you’re about to cry, or tension in the side of the neck/upper back when you are trying to hold back an emotion, I’ve found that noticing is step 1! I want to share with you guys some simple and practical facts and steps that you may or may not already know, using a bit of my somatic awareness knowledge!
- There is a thing called FASCIA in our bodies that keeps all the muscles and organs in place! Many people store tension in these tiny web-like fibers and don't even realize it. For this instance, I'll refer to the Superficial Back Line!
- (This concept comes from Thomas W. Myers, an integrative manual therapist based out of Maine, USA. I will link his bio below)Now, let’s talk about this Line! The Superficial Back Line is an interconnection of fibers from the eyebrows to the bottoms of the feet, running in two lines, see picture below:
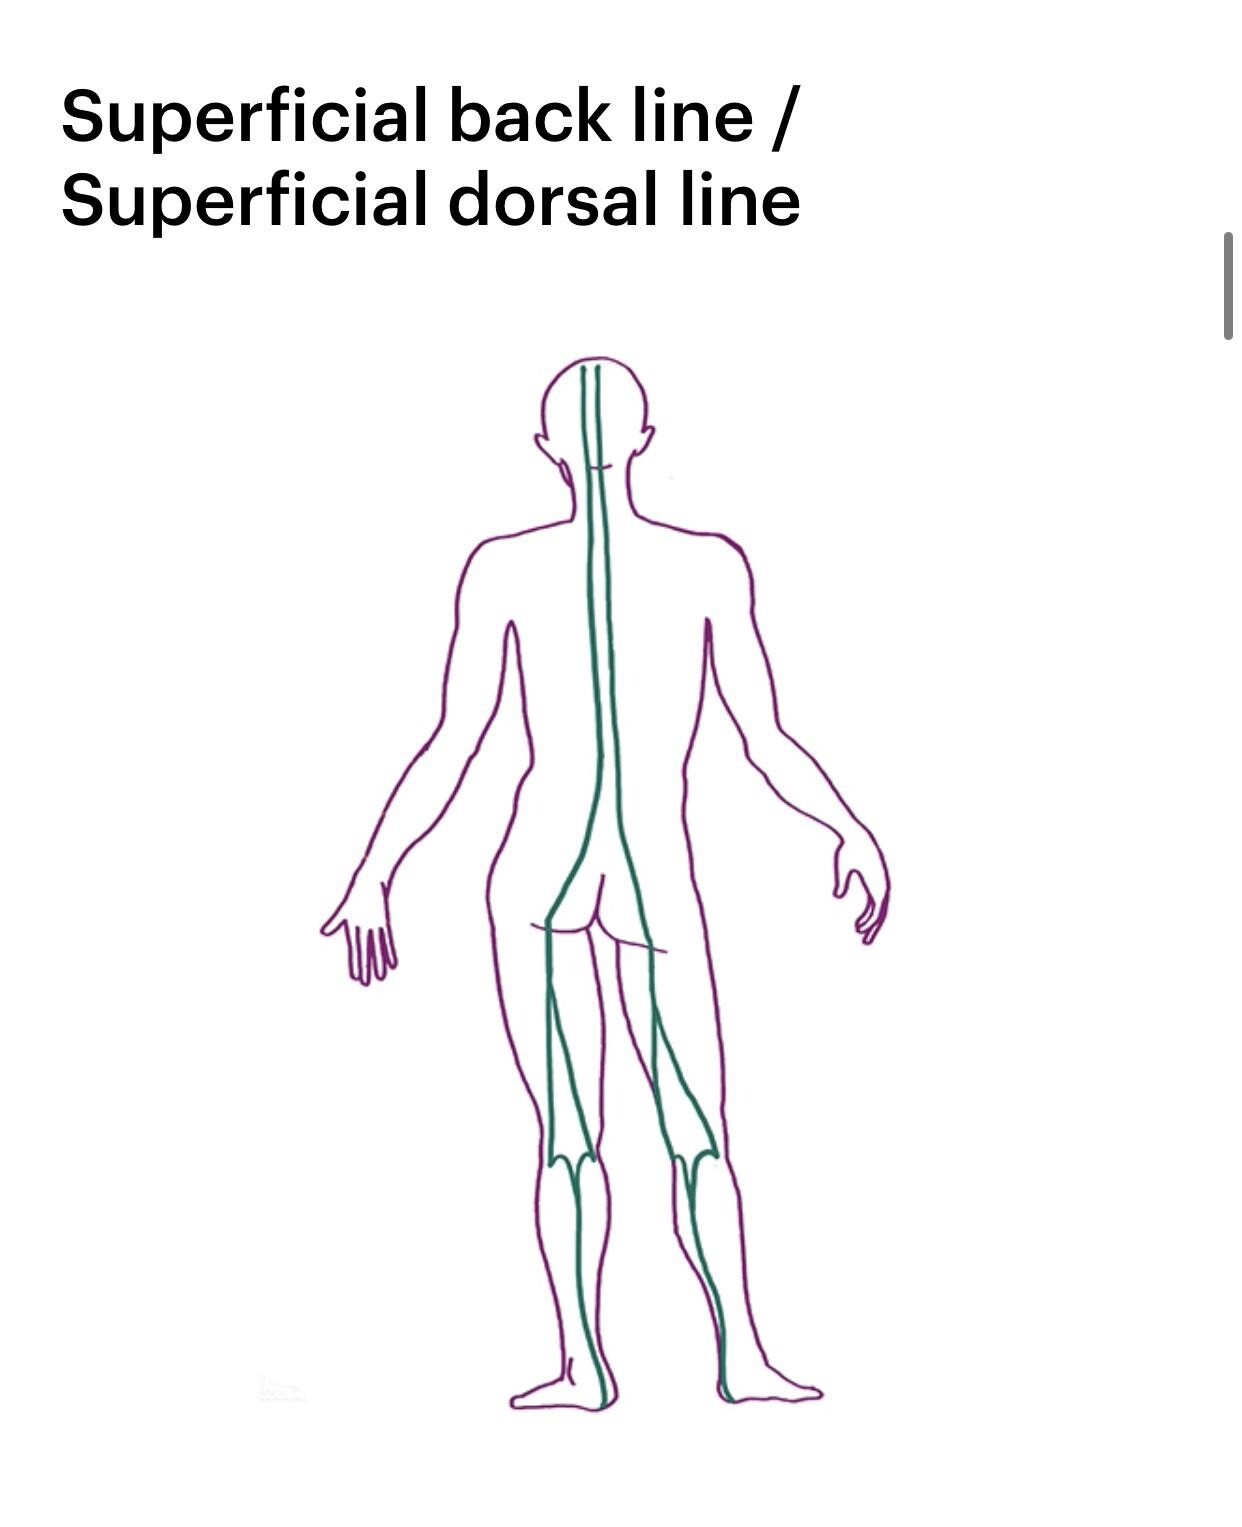
- I find I hold a lot of stress along this line (calves, hammies, back of neck, etc). There are MANY other meridians as well, I’ll link a resource below!
- I notice when I put oils, such as stress away, lavender, release, and frankincense along the lower back and base of the skull, and give myself a tiny massage while doing it, it occupies my physical energy and I feel more grounded in the present moment.
- I’ll also do the same with Peace and Calming every night before bed in my feet! The Life Science EO Ref is great for more details, but I’m going to discuss Myers' perspective on treating the superficial backline verbatim from his website below!
“How you can ‘treat’ the superficial backline yourself:
A very simple way to examine the superficial back line’s function, and thereby understanding how the body is composed, is called “exercise ball“.
- Stand up with your legs straight and bend forward. The goal is for your fingers to reach the ground, but not everyone can reach. Anyway. Note how far down you come.
- Take a golf ball, a tennis ball or something similar and roll it (with pressure) for about 1-2 minutes under each foot.
- Repeat step 1 and note how far down you will reach now. You should come at least 5cm further down. Otherwise, repeat step 2 and try again.”
What I recommend is doing step 1 above, then apply oils to lower back and neck, then doing step 2 and 3! I’ve found it to be a great way to use oils as aromatherapy while also doing something physical to ground you in moments of stress or anxiety. Giving oneself a physical task sometimes alleviates the “swirl” because in my experience, it has helped to still my heart and mind and focus on my physical body. I’ve felt so detached from my physical body so many times, especially in these kinds of moments, it’s actually surprising how doing these small adjustments make such a difference.
An added benefit of this stress relieving work is also, less back pain, alleviates tension in feet and headaches, etc. Add the oils on top of that and wowee! It certainly has invited me into a deeper processing emotion place and I’m grateful!
Below is a link to Thomas W. Myers, author of Anatomy Trains: https://fasciaguide.com/treatment/fascia-lines-the-intersections-of-the-body/
If you try this, let me know!! I’d love to hear any stories and if you see a difference after practicing these steps! Remember, grounding in your physical body is such a beautiful thing! It has changed my life, even just by doing the little things, helps me be more present and more aware, and God knows we all need a bit more of that in our lives in days like these! Love to you all ♥️